
The photographers, programming wizards, and coding geeks over at Topaz Labs have developed some impressive photography software in the past couple of years. Previously, I mostly used Topaz apps and plugins for adding special effects or unusual looks to my images, but I’ve now added some of their newer “AI” programs to my photo processing tools. I’d heard from other pro photographers how good Topaz DeNoise AI and Gigapixel AI are, so I decided to do some testing myself.
Some photographers like to spend hours on the computer just processing and finessing one image. They are masters of the fine points of Photoshop and know fourteen different ways of sharpening an image and six methods of enhancing tonal contrast. That’s not me. My workflow is generally to do some basic adjustments in Lightroom, and if I think the image needs more I’m happy to use a plugin or additional software to apply a preset or filter that someone smarter than me has developed.
On the other hand, I don’t want to take the time to open up additional apps to process a photo if it isn’t going to noticeably improve the image. I wanted to find out if Topaz DeNoise AI and Sharpen AI could give me demonstrably better results than what I could achieve using the built-in tools in Lightroom. I’ve tried other apps and plugins in the past that either didn’t show me any benefit, or they were too cumbersome to use regularly.
Topaz DeNoise AI
Digging into my files, I found a photo that was taken several years ago that had some noticeable noise. The camera used had a sensor that was considered good at the time but couldn’t hold a candle to what newer sensors can do with low-light, high-ISO exposures. Plus, I had purposely underexposed the capture so as not to blow out important highlights, so I needed to bring up the shadows quite a bit in Lightroom. The screenshot below shows a comparison of the image at Lightroom’s default settings for sharpening and noise reduction and what Topaz DeNoise AI was able to do at its one-click Auto setting. I didn’t see any need to move the sliders from the Auto adjustments, but as with all Topaz AI programs, you can modify settings and adjust the opacity of any treatment.

The difference may not be apparent when viewing a screenshot on this blog post, but at 100% on a quality monitor, it is obvious that DeNoise AI did a remarkable job of reducing the noise. The program also sharpened the details, and did so without producing any artifacts or haloing. I was able to achieve a similar amount of noise reduction just using Lightroom, but doing so also softened the image details, and I was not able to recover the detail by increasing the sharpening amount and detail in Lightroom without introducing artifacts.
Topaz Sharpen AI
Another photo from my files proved to be a good test for Topaz Sharpen AI. I’ve always liked the image below, but when I went to process it I was disappointed to see that, viewed at 100% on my monitor, it was not quite sharp. When I checked the metadata for this image, I saw that it was shot at 1/20 second at an effective 82mm. As I recall, I was handholding the camera, and with a pre-VR/IS lens (or in-body image stabilization) it’s not surprising that the image has a tiny bit of motion blur.
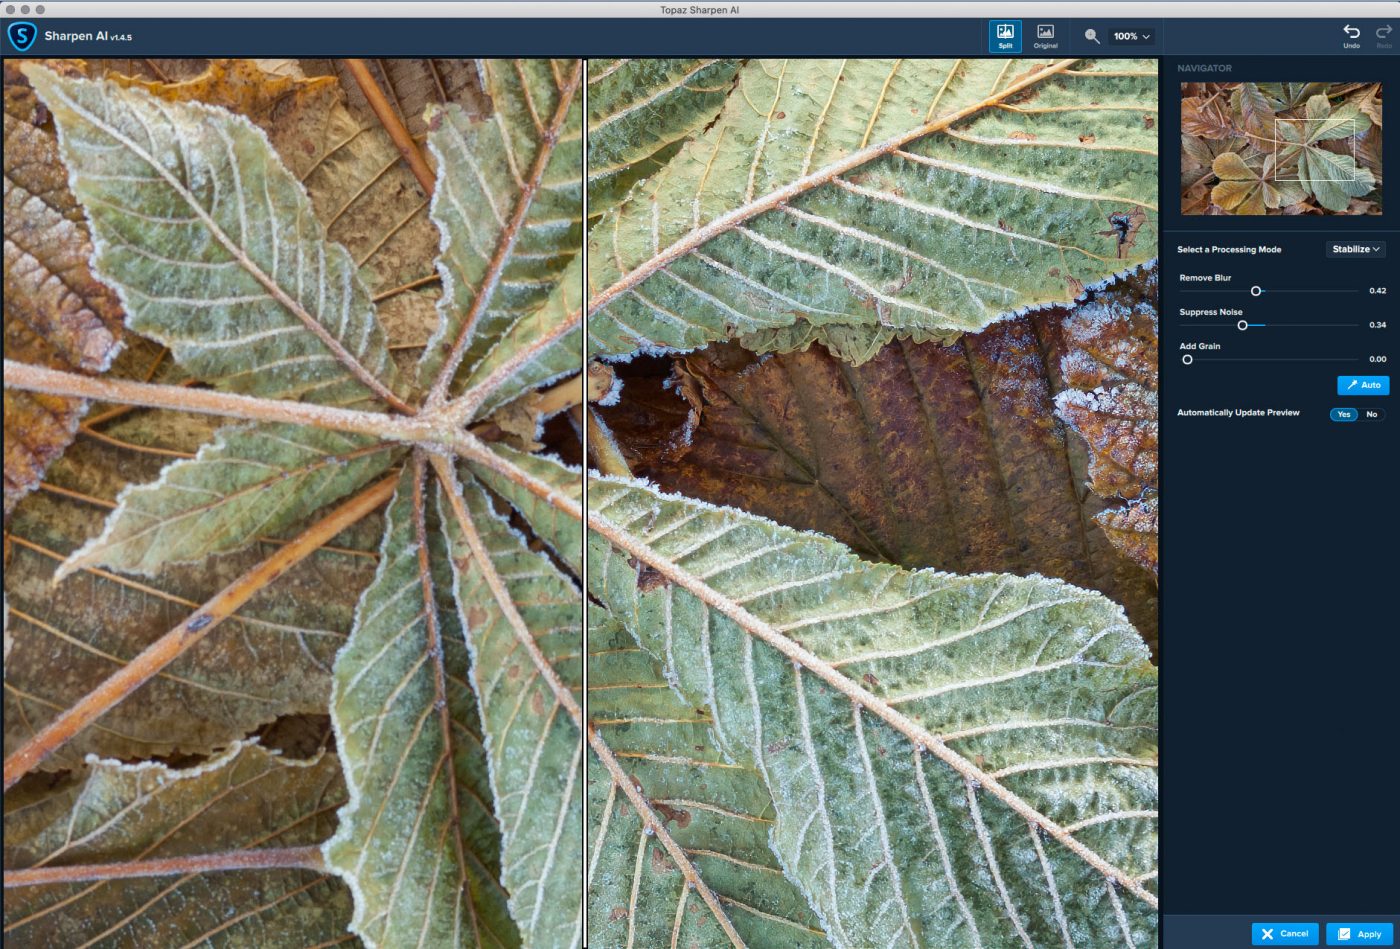
Topaz Sharpen AI has three different modes of sharpening to choose from – Sharpen, Stabilize, and Focus. I tried all three modes on this image and achieved excellent results using the Stabilize mode at its Auto setting. As you can see in the comparison, sharpness was noticeably increased, and without added noise. I was frankly amazed at the improvement made by Sharpen AI, and now have no problem submitting this photo for publication, sending the file to a stock photo agency, or making a good-size print.
These are just two of the Topaz suite of programs – I intend to explore more with Adjust AI and Studio 2. I also did a quick check of Topaz Gigapixel AI and was equally impressed. This program can increase the size of a digital image file to enable much larger prints that are possible at the native file size. My friend Sean Bagshaw did some extensive testing of the program and shows his results on this YouTube video.
If you’re interested in testing these programs yourself, you can download free trial versions at TopazLabs.com. I’m confident you’ll find these programs a great addition to your photo processing software. Right now is a great time to purchase any of these programs because all Topaz products are on sale at 25% off right now and through December 27, 2019.
Disclosure: As a participant in their affiliate program, Topaz will reward me if you purchase from the above links. There is no extra cost to you, and I want to assure you that I would not be recommending them, or posting this review, if I didn’t personally use these products and find them a valuable addition to my photo processing tools.
Great article and tips to use, I have just downloaded a trial, pretty impressed with the results so far.
Thanks, Peter. I hope you find these plugins as useful as I have. Sharpen AI in particular has done wonders on a few of my wildlife photos where my shutter speed was not quite high enough or my focus just a hair off.
Great and to the point.
Quick question: Have you had to use both tools together? If so, have you noted any differences in the order of usage?
I’ve only used them both on one photo, trying to salvage a noisy and soft image. I used DeNoise AI first, so that Sharpen AI wouldn’t sharpen the noise (although it does a very good job of avoiding noise most of the time).
DeNoise has an option to add sharpening, and Sharpen has an option to reduce noise, so in most cases only one of the apps is needed. With landscapes shot at a low ISO and the exposure giving a good histogram, I mostly just use Sharpen AI and no additional noise reduction.
Hi Greg
Hi Greg
In your review of the Topaz AI applications you didn’t comment on the speed of the sharpening or noise reducing processes.
Although my desktop isn’t that ancient, I found they worked very slowly but the results were worth waiting for.
What does my system need to speed things up a bit?
Hi Rodney. Thanks for pointing that out – I should update this post. When I tested those two apps, it was with files from an older camera with lower MB file size. With the 46 MB files from my Nikon Z7, the processing time is definitely slow with my 5-year-old MacBookPro. As you say, the results are worth waiting for, so I try to take advantage of the time to get up and stretch.